Dreaming of sculpting those perfectly strong curves? Then hip thrusts should be your go-to. But don't let its seemingly simple appearance fool you. While it may not look as intimidating as squats or deadlifts, it's shockingly easy to slip up on this one. Ever found yourself feeling the burn in your thighs or lower back, but not so much in your glutes during hip thrusts? If that's a yes, stick around. We're diving into how to correct those sneaky mistakes you might not even know you're making in your hip thrust routine. Let's get those glutes working the way they should!
What Is A Hip Thrust?
The hip thrust is a compound ‘hip extension’ exercise that primarily works the gluteal muscles, as well as a little bit of the hamstrings, core and quadriceps. But obviously, we want to make sure the booty does most of the work, right? Which is why your form and technique is so important. Less back ouchies, more butt burn. Ya feel me?
So let’s break it down from the start…
Watch this hip thrust tutorial.
How To Set Up For The Perfect Hip Thrust
Before you start loading up the barbell, please practice with your body weight only first, so you can perfect your form and technique. To set up you’ll need a bench and a barbell. By the way, you can do this exercise from home just as effectively, even if you don’t have a barbell or bench. Just use my Strong Curves Booty Bands and place a dumbbell on the crease of your hips instead.
1. Bench Height = Shin Height
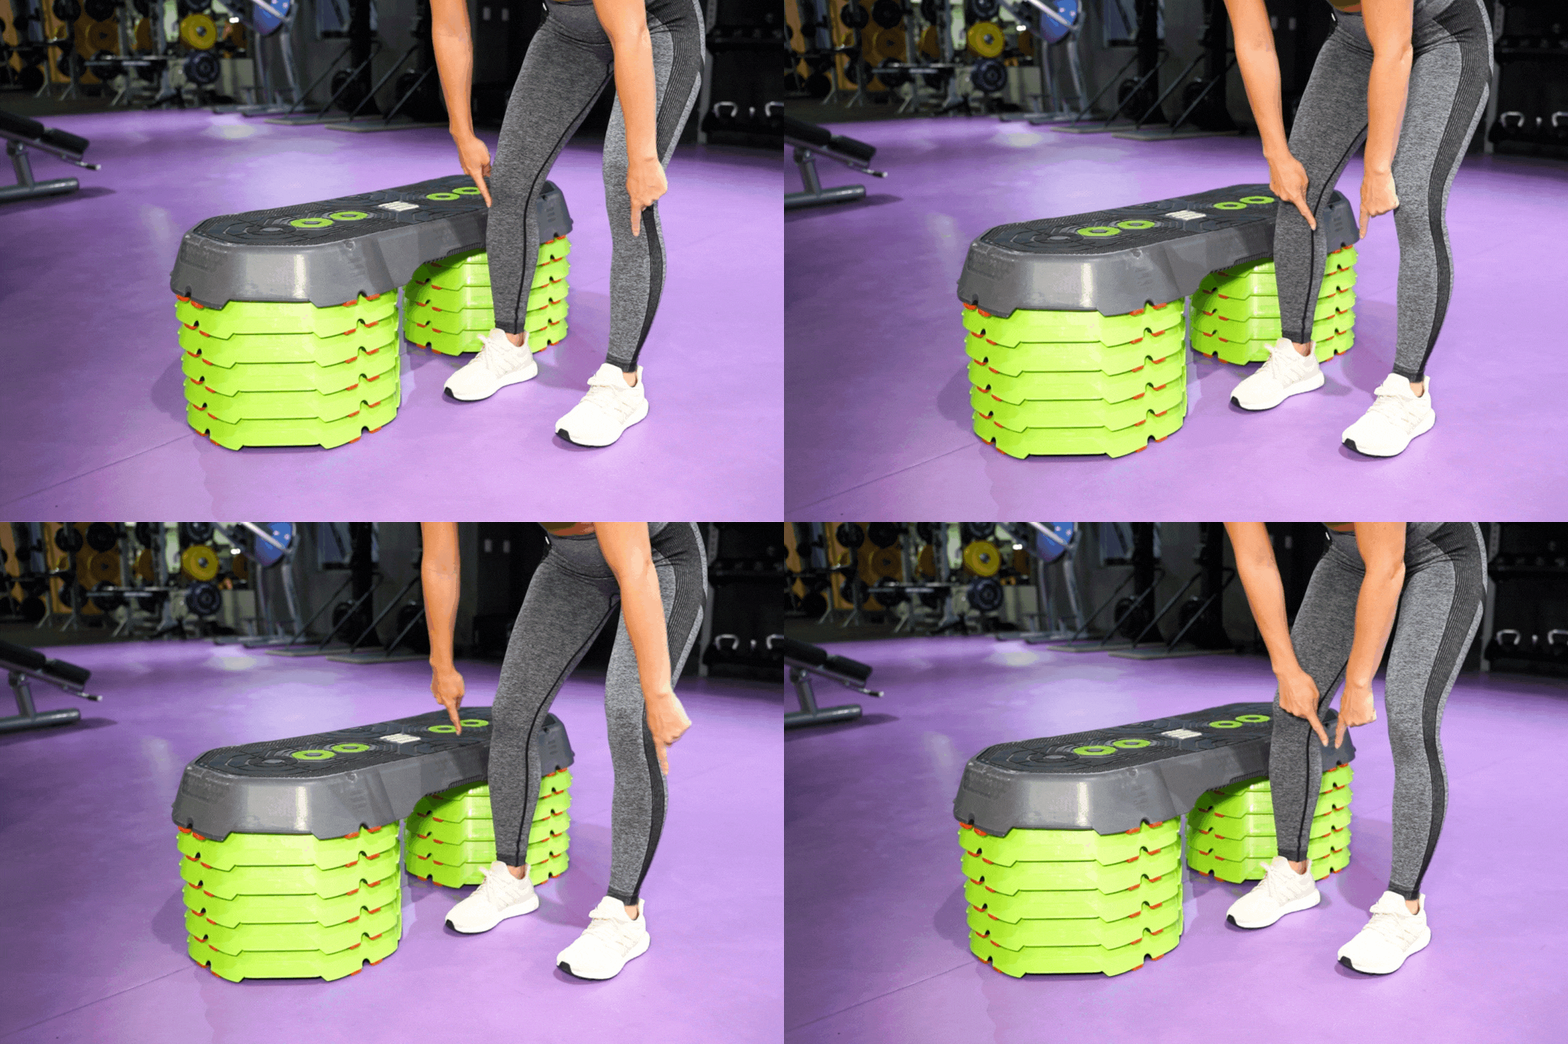
Standing upright, the bench should reach just below your knee cap. The aim is for your torso to be parallel to the ground at the top of the move. Using risers and a step means you can control the height of the bench to your exact needs. If you’re using a fixed bench, it might be too high. If this is the case you can elevate your feet on a plate weight or if you have limited equipment at home, just use some sturdy yoga blocks or books. But make sure they stay fixed in place so that your feet don’t slip during the exercise.
2. Back Placement
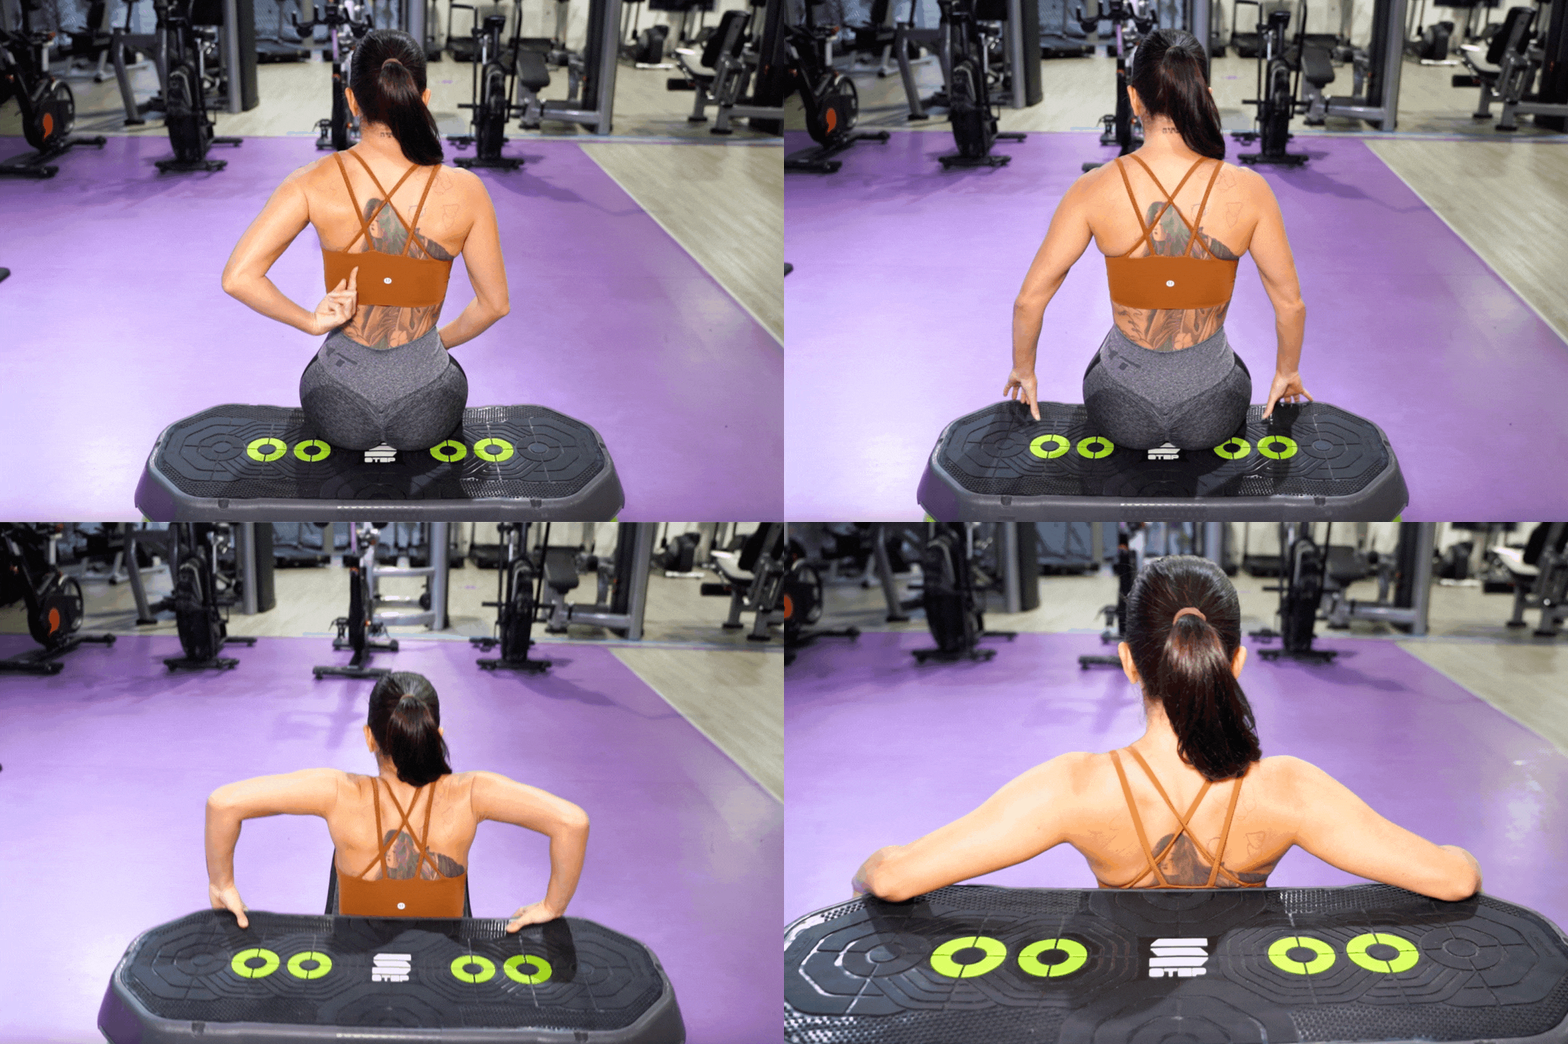
If you’re using a flat bench, it’s a good idea to position it against a wall so that it won’t shift backwards throughout the movement - especially if you’re lifting a heavy weight. Sitting with your back up against the edge of the bench, line up the bottom of your scapulae (shoulder blades) with the edge of the bench, roughly where your bra strap would be.
3. Feet Placement
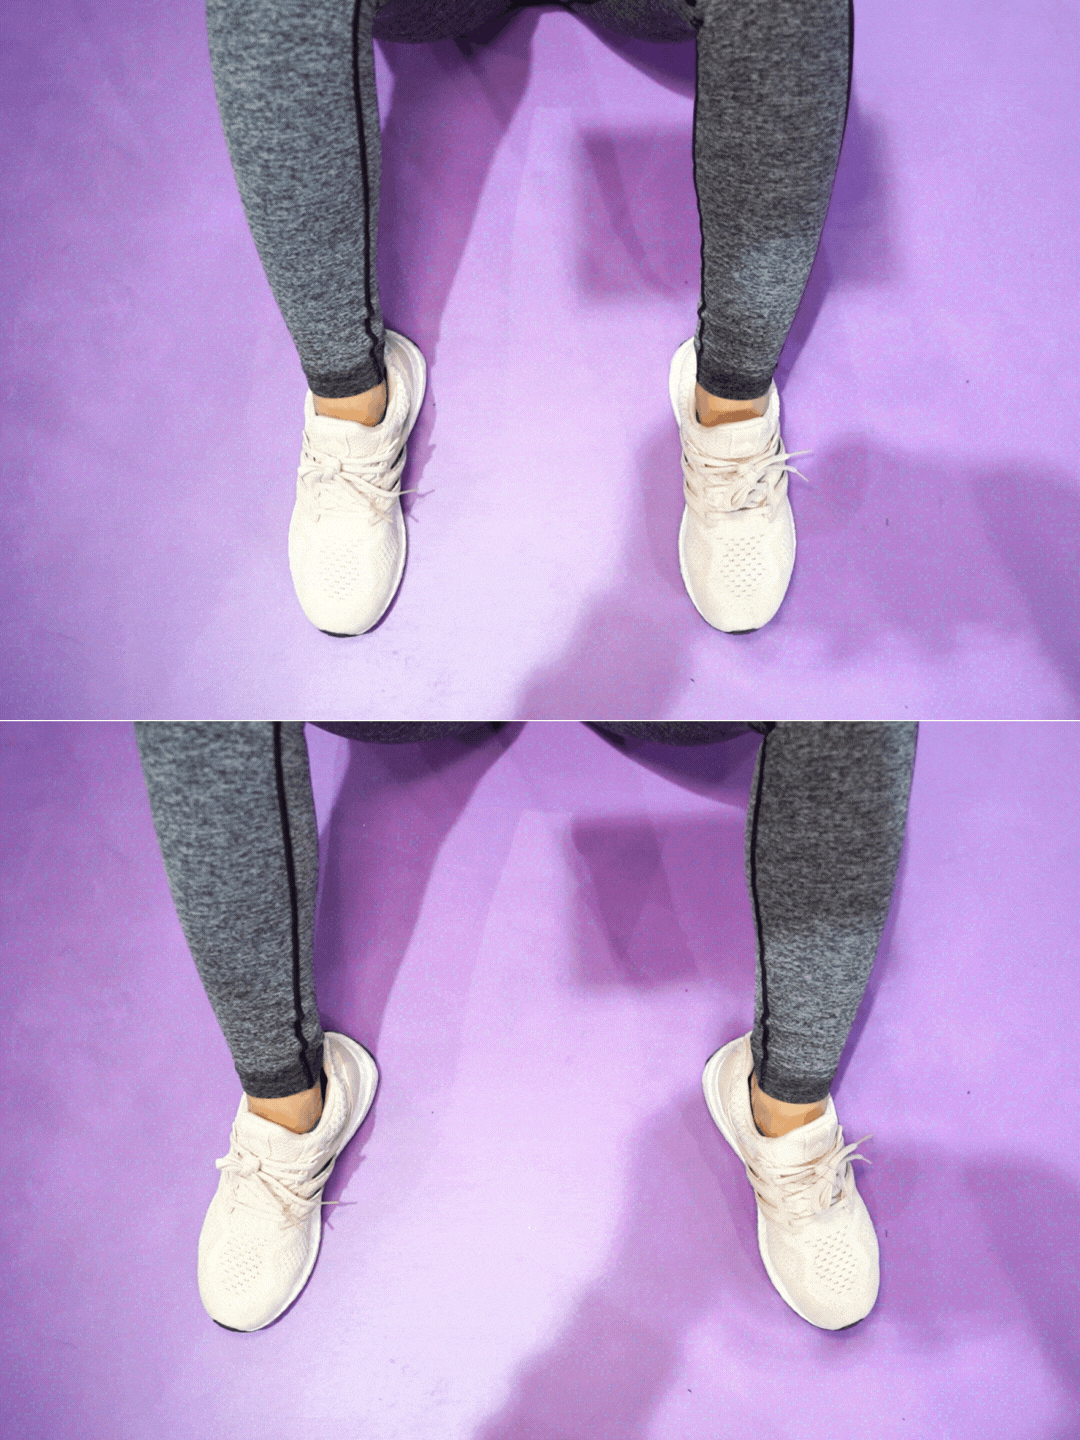
Bending your knees, bring your feet in towards you. The aim is to achieve a 90 degree angle at the knees at the top of the move so your shins stay vertical. If you bring your feet too far in you’ll feel it more in your hamstrings, lower back and quads - especially if they’re super tight in those muscles already. If the feet are too far out, you may not be able to get full contraction of the glutes at the top of the move.
PRO TIP: If you do have very tight hip flexors and quad muscles that tend to take over during this exercise, you may even want to bring the feet slightly further out so that they’re a little more than 90 degrees. This may help to alleviate pressure on your quads and allow you to achieve a better glute squeeze.
How wide you take the feet is personal preference. It all comes down to your own body shape, hip width and leg length. Some people prefer their feet just a little wider than shoulder width apart with the toes pointing out slightly. Others prefer a narrower stance with the feet pointing forward. Try a few different stances to see what feels best for you. The aim is to be able to squeeze the bejesus outta your butt cheeks, so whatever position allows you to do that, do that!
4. Head Placement
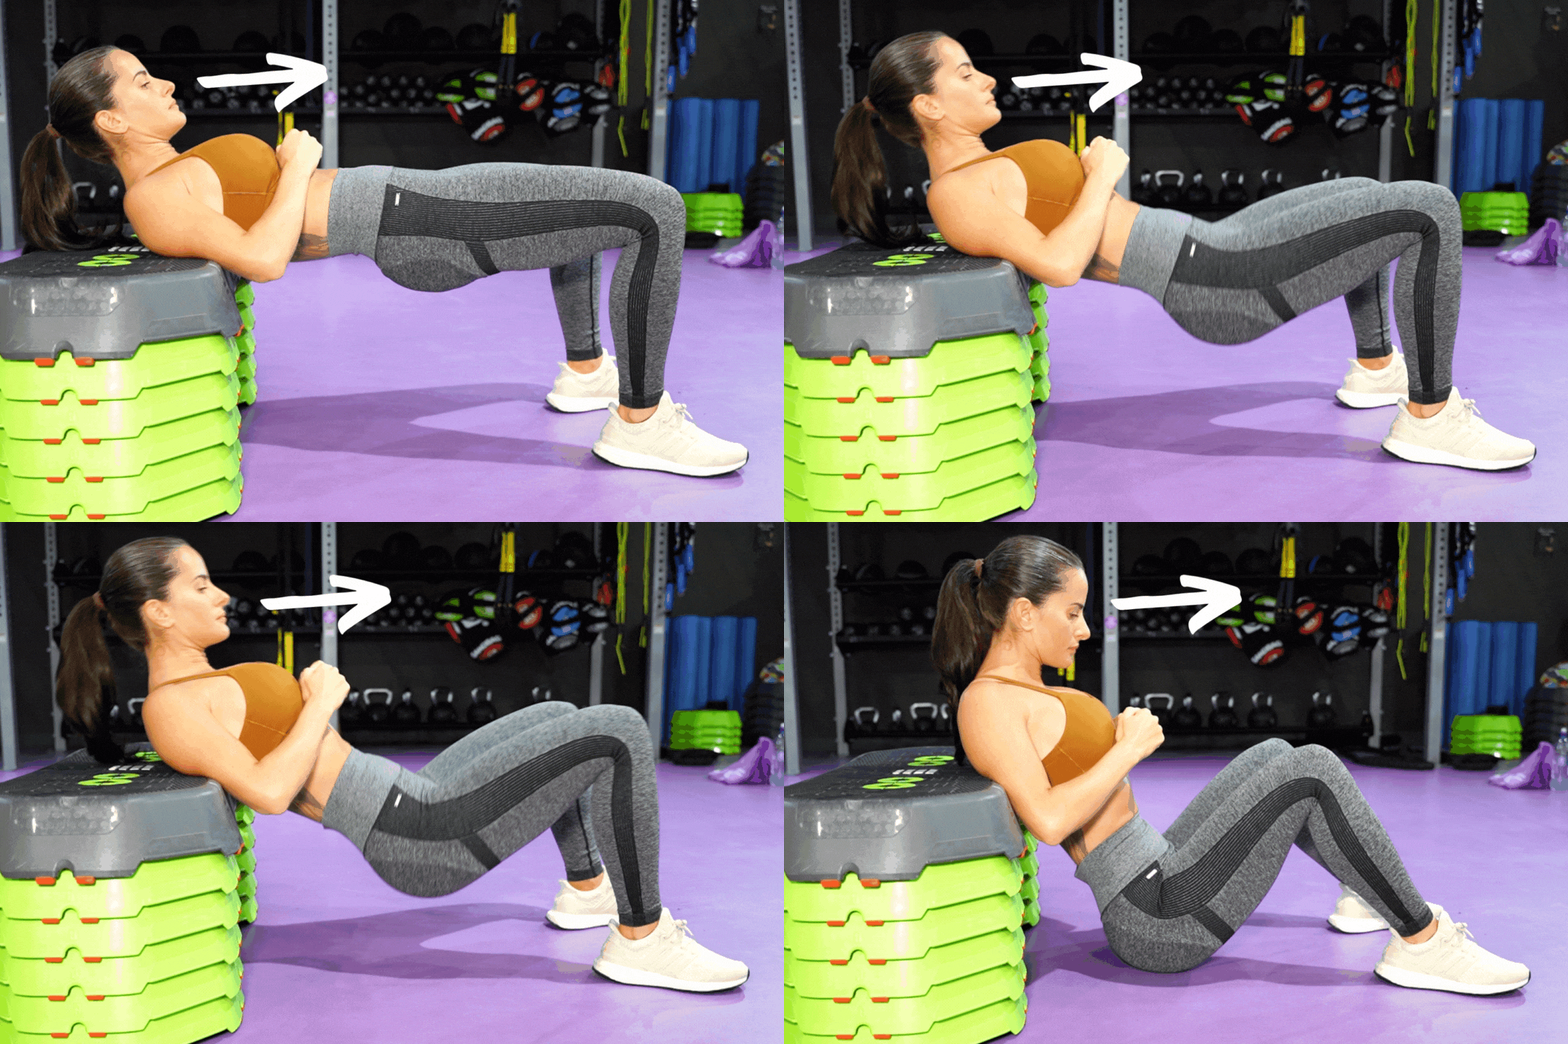
Look forward the entire time, keeping your chin tucked and make sure you’re doing a posterior pelvic tilt (PPT) for maximum glute contraction. This action will also help to keep your core engaged and ribs down to protect your spine. If you don’t know what a PPT is, you MUST check out this video. Trust me, it’s a game changer.
How To Perform A Body Weight Hip Thrust
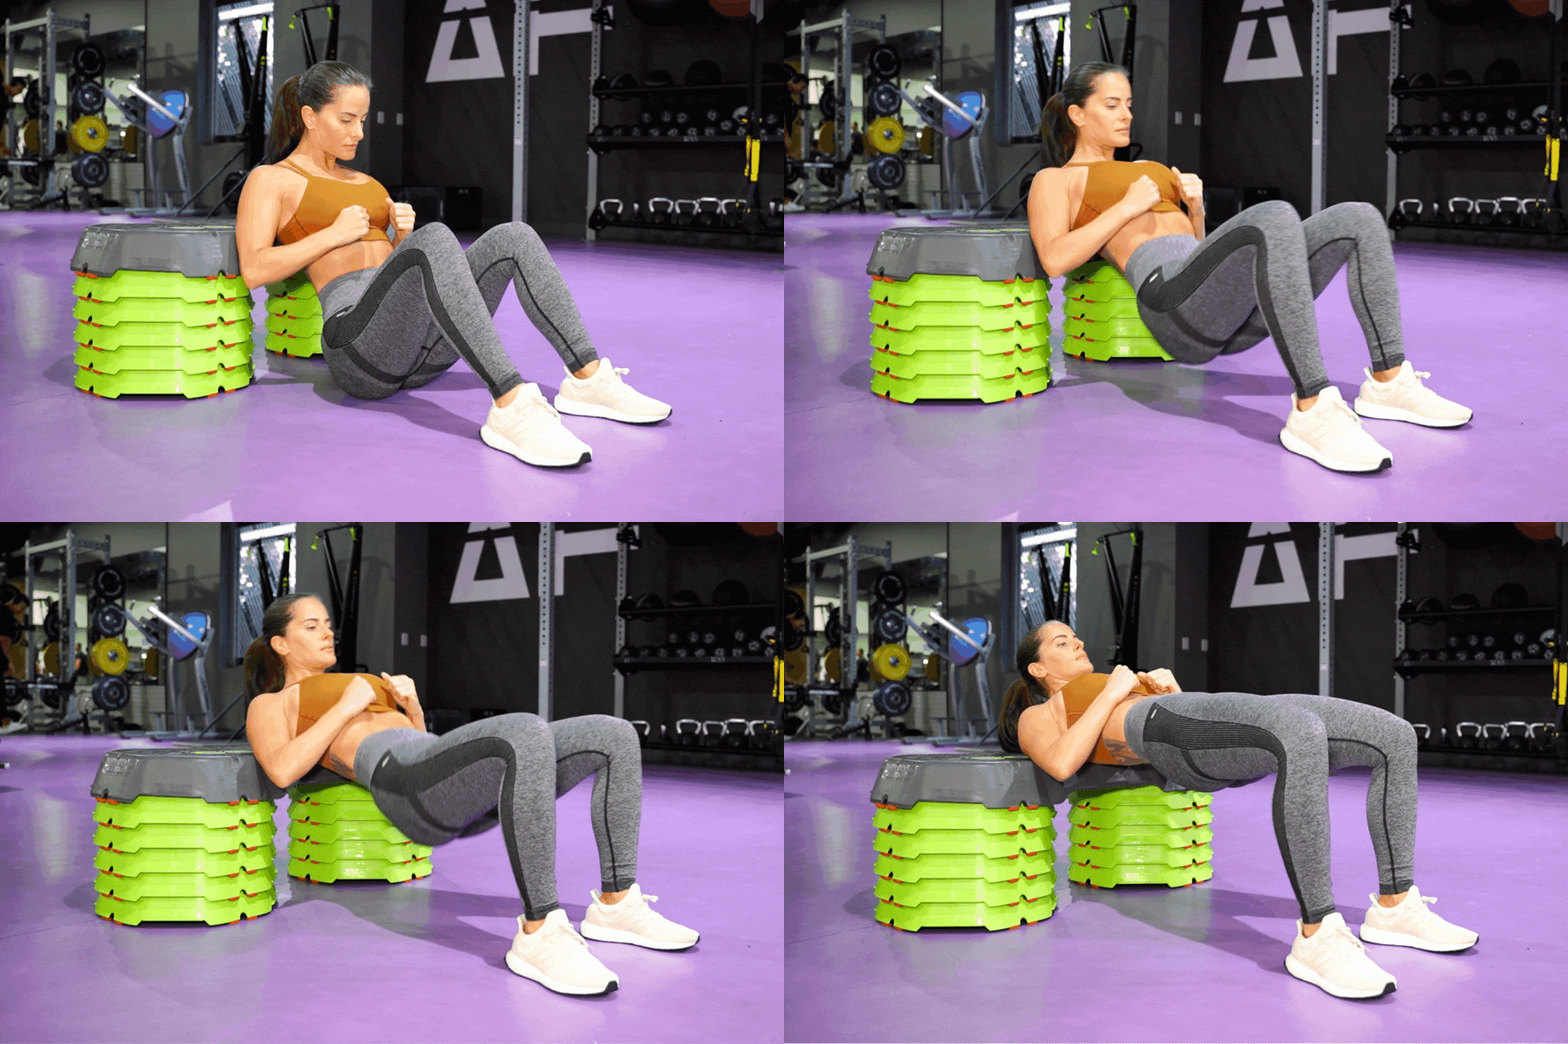
Dig through your heels and push your hips up to the ceiling, keeping your spine neutral throughout.
At the top of the movement, your torso should be parallel to the ground in a flat table top position.
With your hips fully extended, don’t forget to do a slight posterior pelvic tilt keeping your core tight so you can get the most squeeze out of those glutes.
To lower back down simply break at the hips, keeping your spine straight and torso rigid.
Stop about an inch off the floor before coming back up for your next rep.
How To Perform A Barbell Hip Thrust
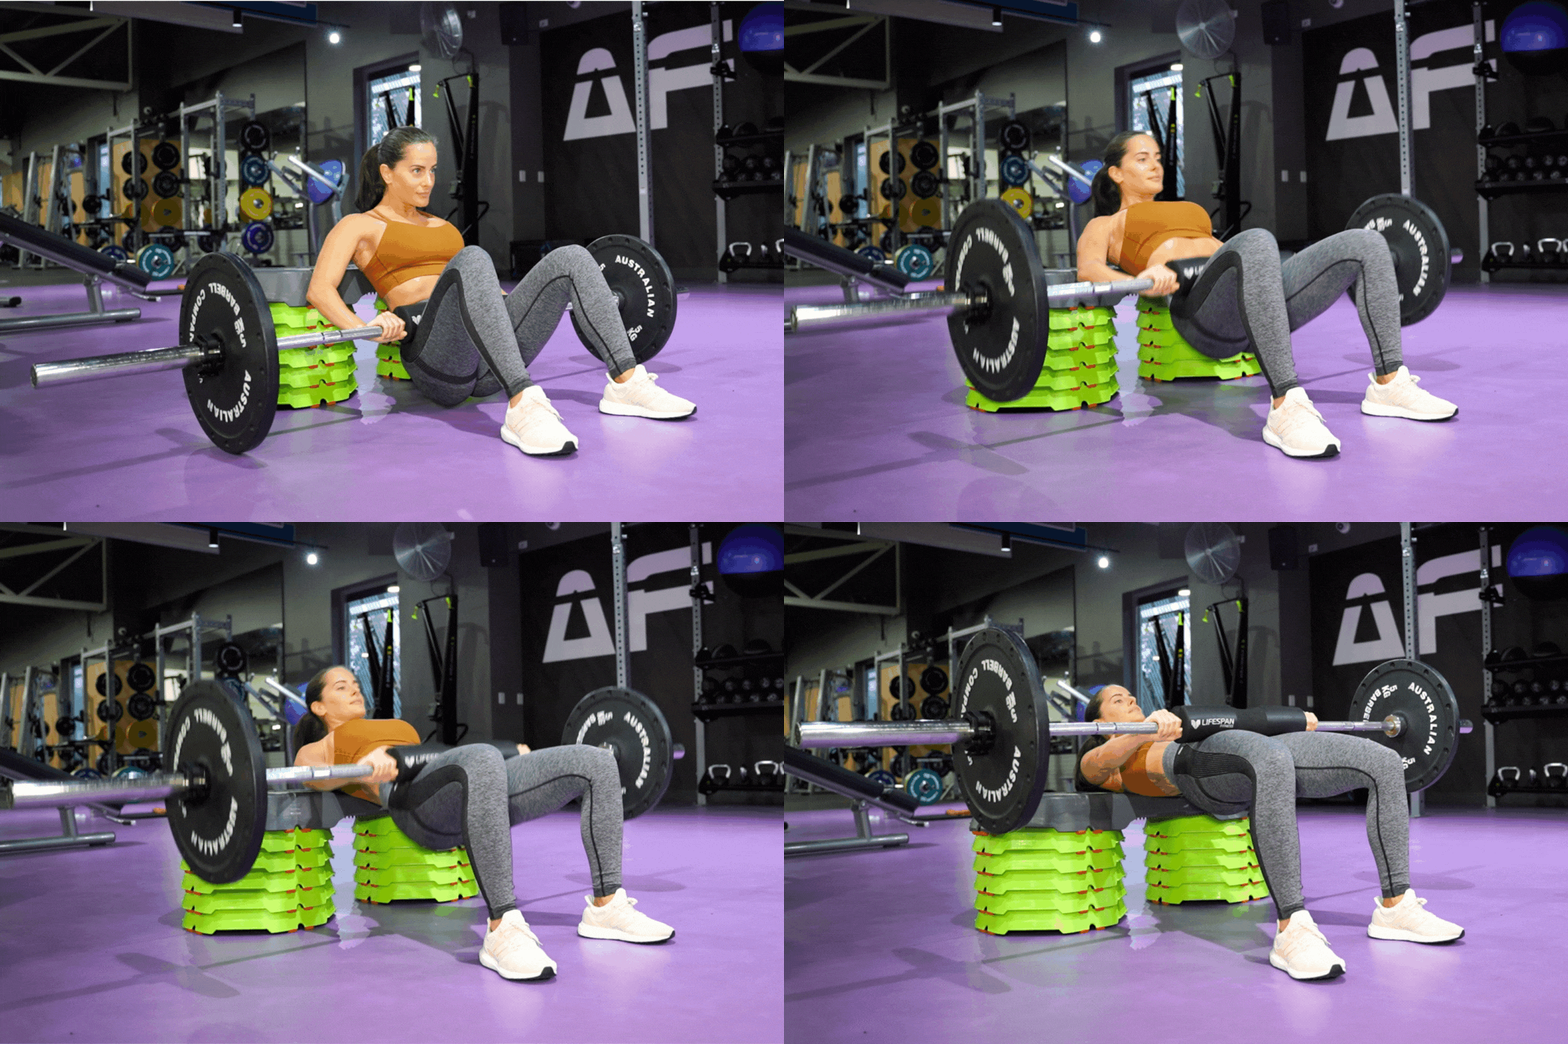
If you’re doing this with a barbell, you’ll need a squat sponge to protect your hip flexors. Trust me on this. Especially with added weight, it can be super uncomfortable. You can buy Strong Curves Squat Sponge here. But a rolled up yoga mat or towel works too.
Set yourself up against the bench, sitting in the right position with legs outstretched in front of you.
Roll the bar towards you and line it up above your hip crease, making sure the bar is centred.
Support the bar either side with your hands.
Bring the feet in towards you and make sure you have your correct feet placement.
Take a deep breath in and hold it, brace you core and drive your hips up to the ceiling by pivoting off the edge of the bench, keeping your spine straight.
With fully extended hips and a slight posterior pelvic tilt, hold for a pause, squeezing the glutes, making sure your torso is flat.
Exhale as you break at the hips, lowering back down to the starting position, keeping your glutes an inch off the floor.
Repeat for your next repetition.
Tips For Perfect Hip Thrusts
1. Pivot, Don’t Scoop
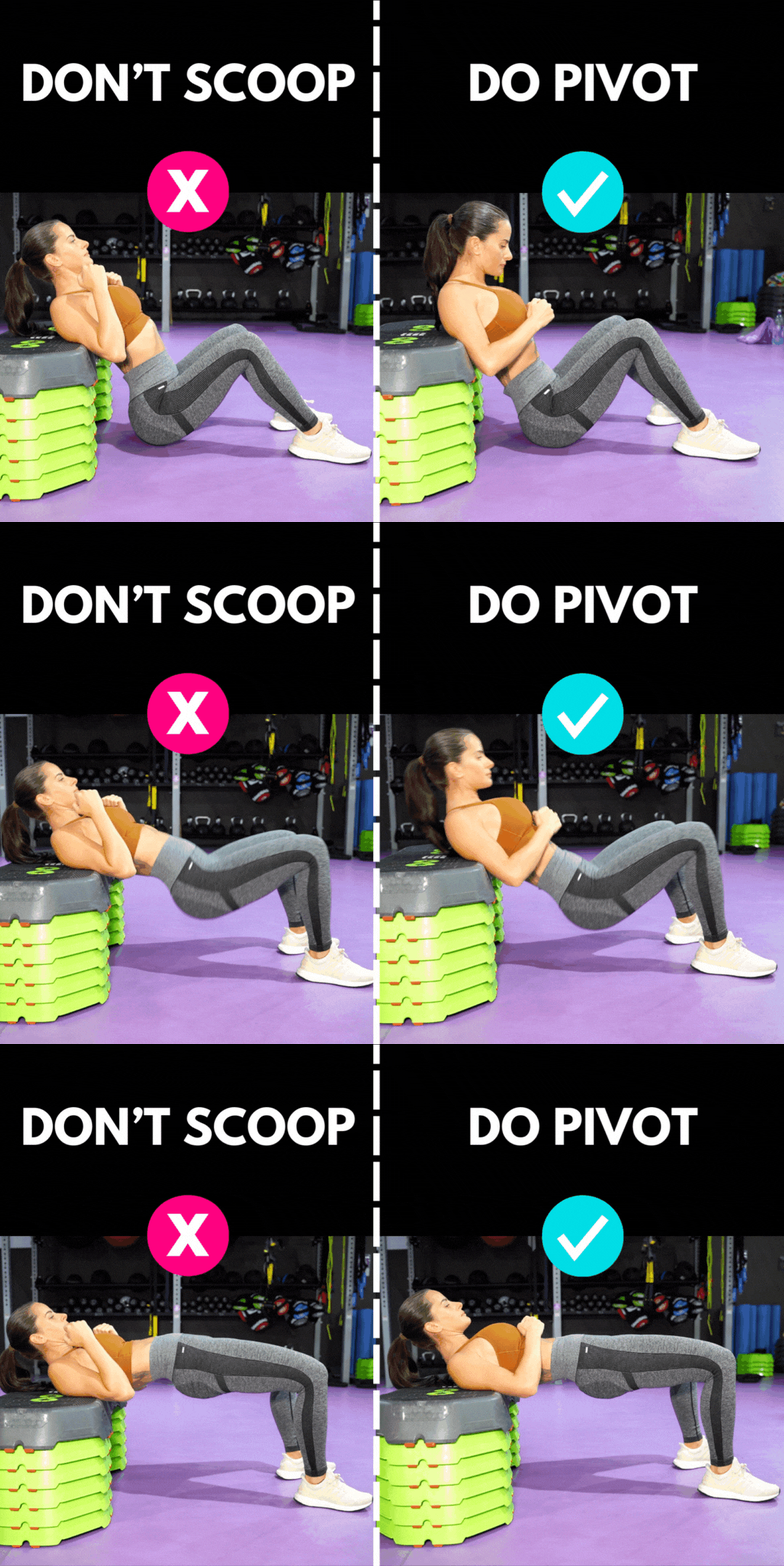
Pivoting off the edge of the bench from where your back and the bench meet means that only your hips hinge. Literally like you’ve got a broomstick up your ass, your spine is going to stay locked straight and rigid the whole time. Do not scoop your pelvis when you lift your hips up and down because all you’ll end up doing is crunching into your lower back as you flex and arch your spine.
When you scoop the pelvis instead of pivoting with a straight spine, your core will splay out, your ribs will poke up and you won’t be able to brace your abs or do a PPT correctly and you know what that means? Zero booty gains and lots of lower back pain.
2. Keep Your Head in Check
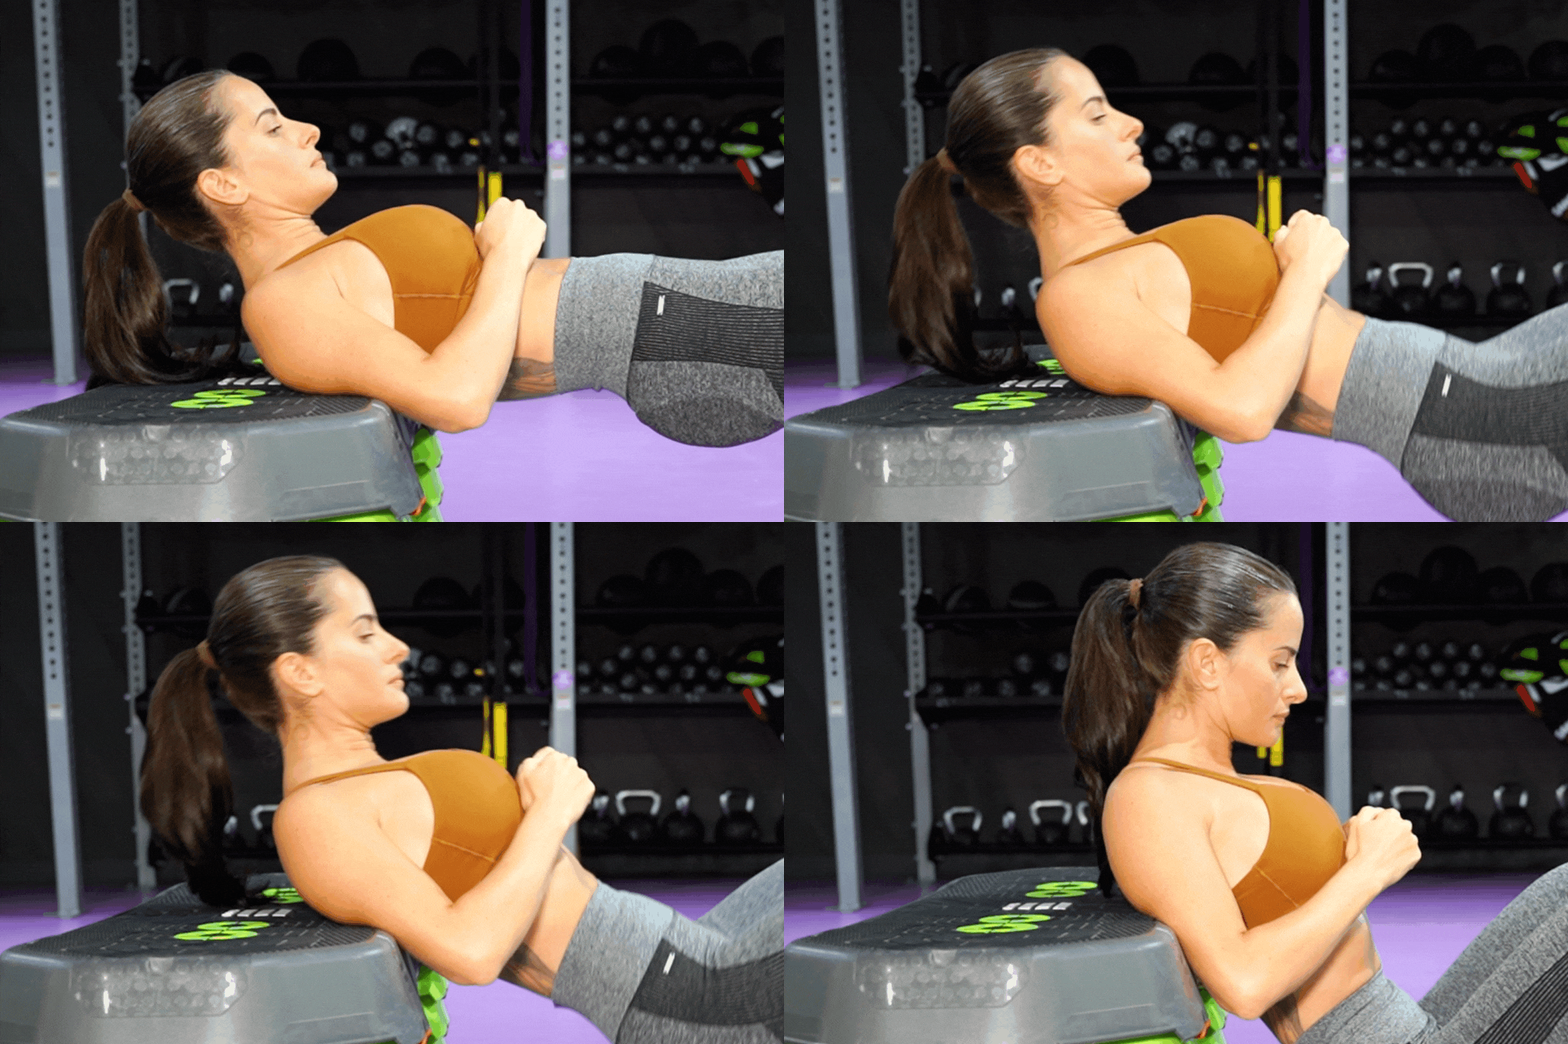
Remember to tuck your chin and maintain your gaze forward. This simple action encourages a posterior pelvic tilt (PPT), which is key to keeping your spine straight. A straight spine not only protects your lower back but also ensures better engagement of your core and glutes. Letting your head roll back and looking up to the ceiling can lead to splaying your ribcage and arching your back, which is a big no-no for spinal health!
3. Avoid Hyper-extending Your Back
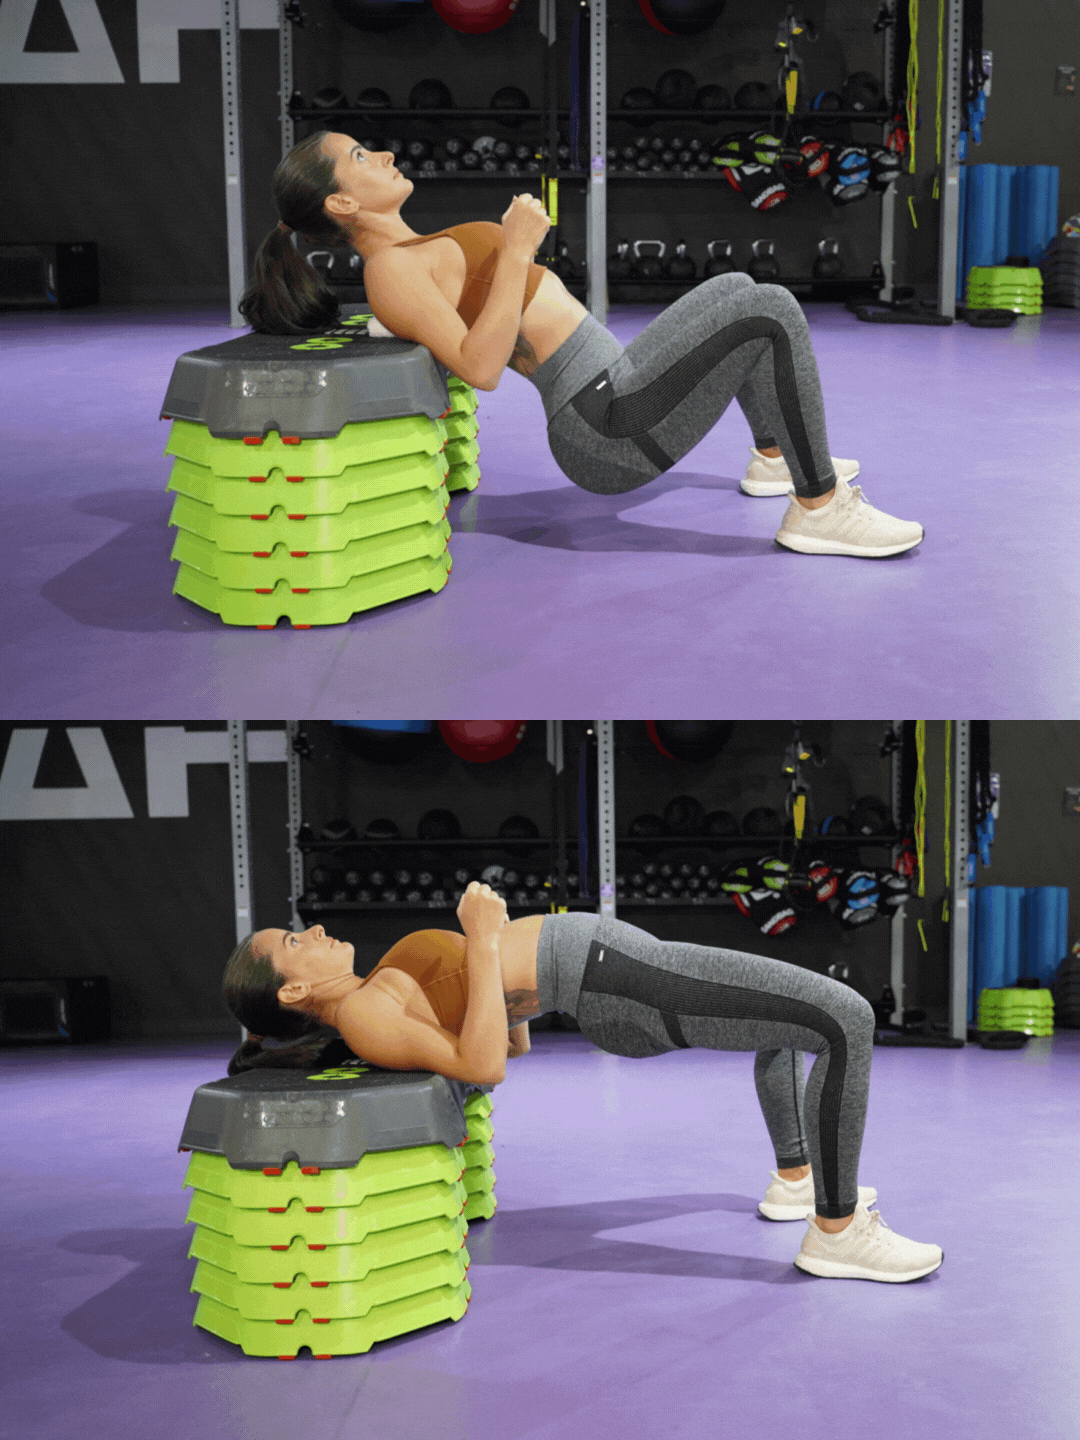
The goal at the top of the movement is to present a flat torso from neck to knee, resembling a tabletop. This position ensures your spine remains protected and prevents you from hyperextending your hips beyond full extension. Overextending can put your lower back at risk of injury. So, think 'straight line' – not 'arching bridge' – to keep your form on point and your back safe.
4. Form > Ego
Don’t fall for the ‘lift heavy or go home’ crap. Young girls thrusting 100kg and scooping their pelvis is not cute. P.S. you don’t need heavy weights to do this exercise effectively. If you go too heavy, your glutes will switch off and other muscles will take over, like your quads and low back - which defeats the point of the exercise doesn’t it? So leave your ego at the door and train smarter not harder.
5. Prep With Glute Activation Drills
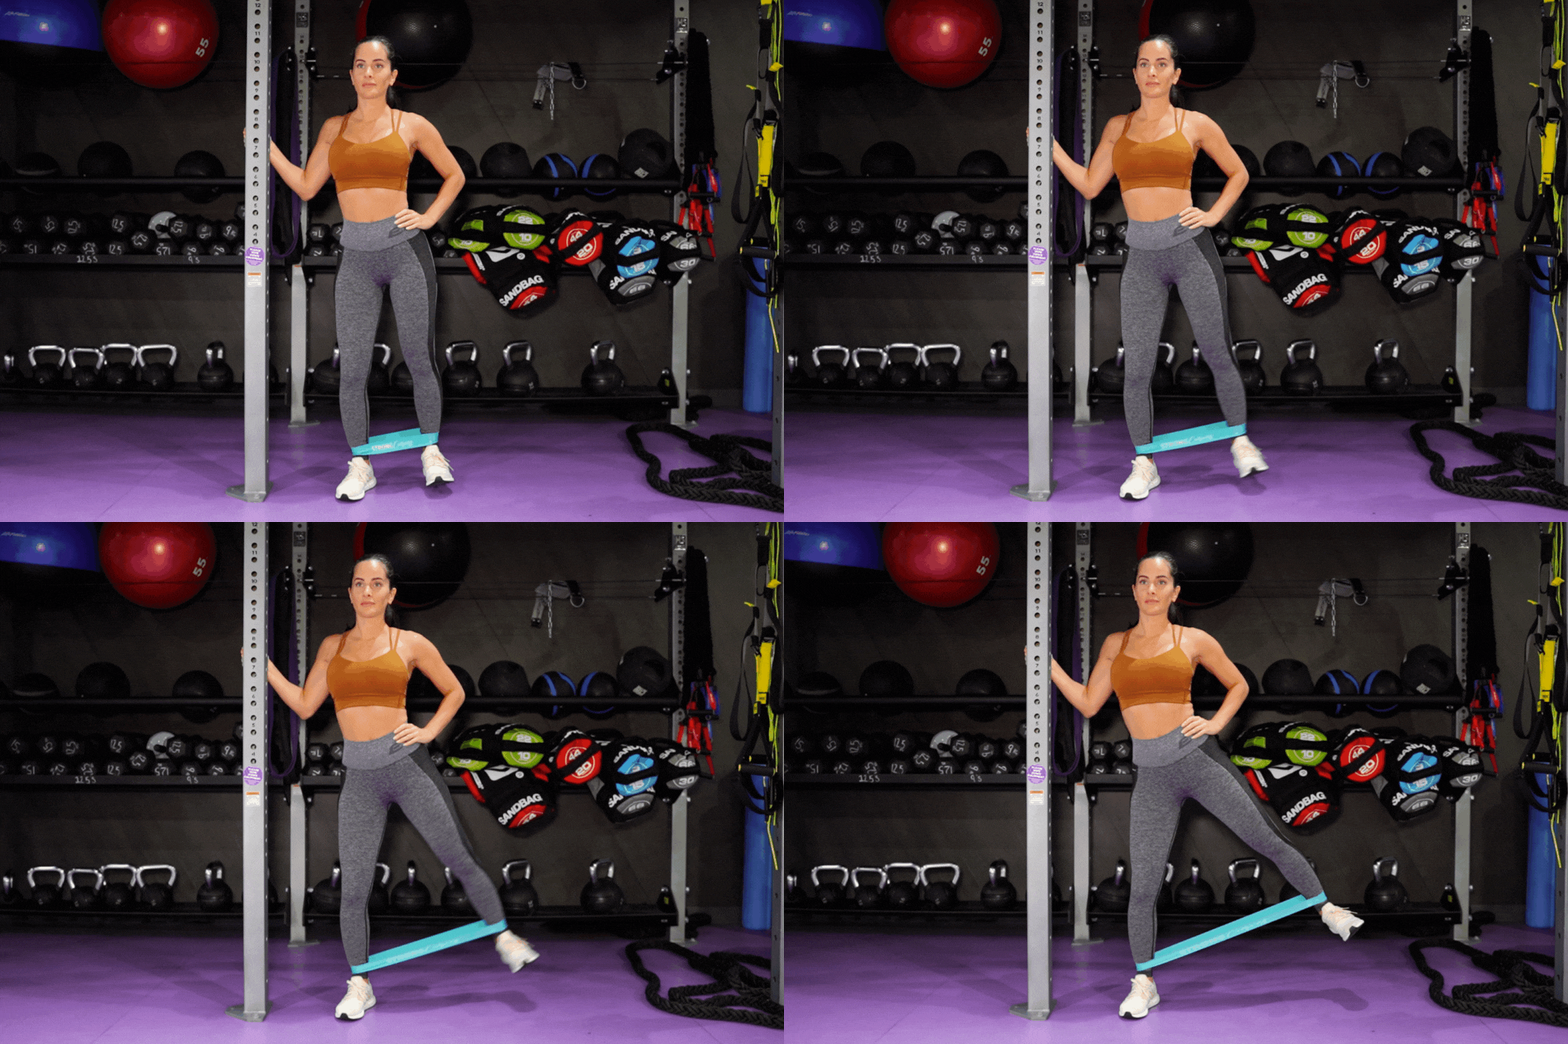
Before doing any heavier compound exercises like hip thrusts, squats or deadlifts, it’s a good idea to start with 5-10 minutes of booty band activation exercises to get the glutes firing. This will help your glutes to switch on better during the exercise without your quads or low back taking over. If your goal is to sculpt a perky butt, this makes a huge difference to your workouts and you’ll get better results.
Hip Thrust Troubleshooting
If you’re doing everything right and your form is on point but you still feel it more in your back or quads you may want to check out my video 'Why Your Glutes Won't Grow' and learn how to do a posterior pelvic tilt so you can actually activate your glutes properly and get them doing the work instead.
But more than likely, your quads and hip flexors are probably way too tight - and tight muscles will always be dominant. To remedy this, spend some time foam rolling (especially your IT band), triggering and stretching out daily and even before and after you hip thrust to release those tight muscles. If they’re tight, they’ll take over and your glutes will just take a back seat, especially if they’re super weak already.
Hip Thrust Variations
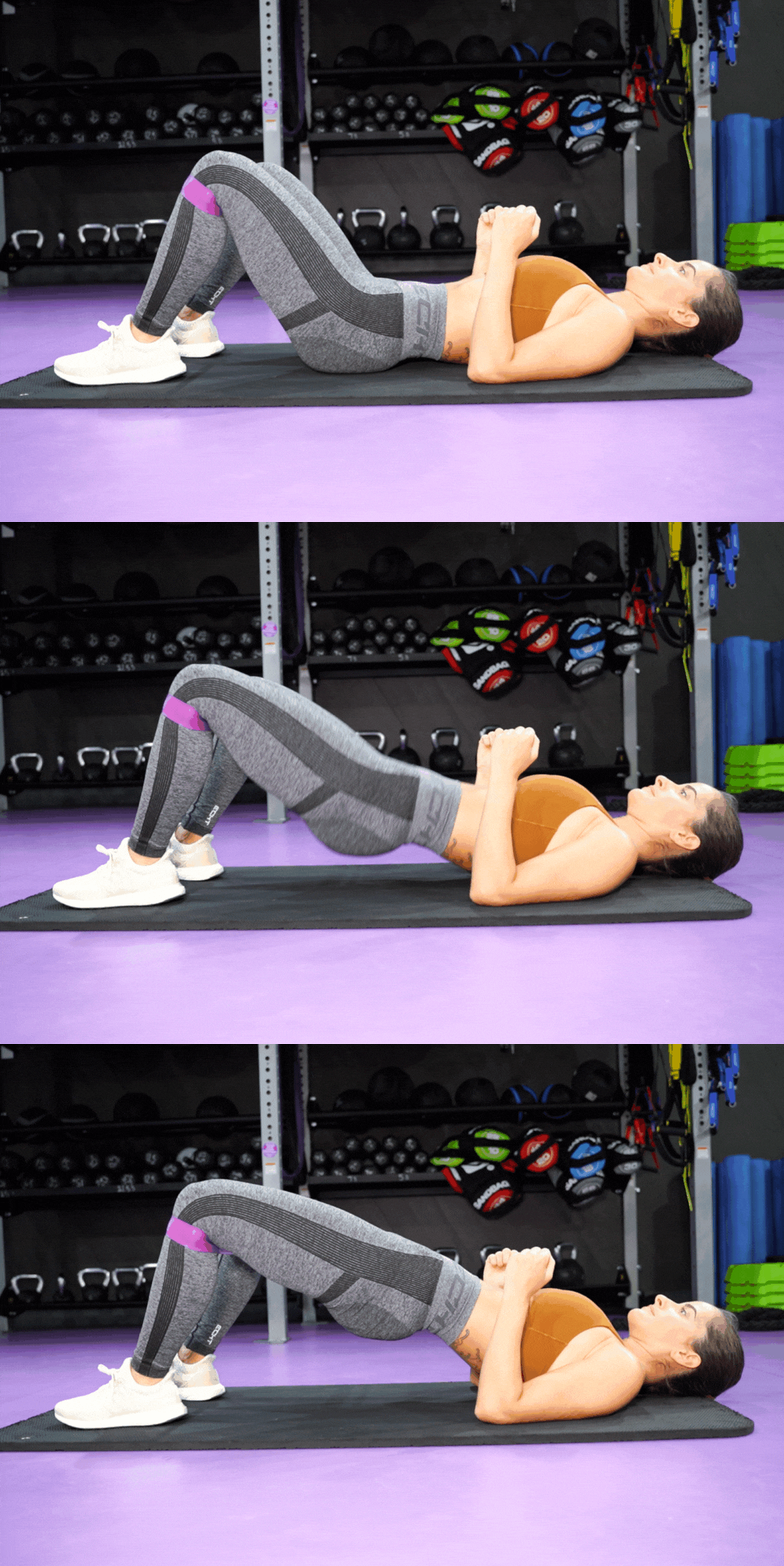
Each of these exercises brings its own unique twist to the classic hip thrust, ensuring that your glute workouts never get dull. Whether you're a beginner or a seasoned pro, incorporating these variations will help you engage and strengthen your glutes, hamstrings, and core in new and challenging ways.
Glutes Bridge (targets primarily hamstrings and somewhat less of the glutes)
Frog Pump (great as a glute activation exercise)
Single Leg Hip Thrust (works your core stability and challenging enough with bodyweight only)
Hyperextension Machine (also a hip extension exercise that targets the back, glutes and hamstrings)
How To Hip Thrust In a Nutshell
Choose a bench the same height as your shins
Line up the bottom of your shoulder blades with the edge of the bench
Keep your knees at 90 degrees and shins stay vertical
Pivot, don’t scoop!
Learn the posterior pelvic tilt
Fire up the glutes with booty band activation
Stretch your quads and hip flexors
)